Hey folks. I've entered in a miniature painting competition and a component of that is that the image of my model needs a bunch of likes. If you could go to the GW wellington page and like my entry I'd appreciate it.
http://www.facebook.com/photo.php?fbid=277648215591004&set=a.276711652351327.65714.196918670330626&type=3&theater
Saturday, October 29, 2011
Wednesday, October 26, 2011
Weathering and Battle damaging 40k Tanks: Part Two
Here it is. The article you've all been waiting for. Painting your battle worn tanks. I have had more people coming to me and harassing me to complete this series than any other. Sorry for the delay.

Right, first things first. If you are going to hand base coat the model the first thing you will need is a really big Brush. I used a Citadel Large Drybrush.

Now, not to belabour the point, the one i make every time I give out painting advice. WATER DOWN YOUR PAINTS!. It's important to do this with any model but it is even more important with tanks. You will be laying down a lot of paint in one hit so if the paint isn't watered down say goodbye to all the detail. If you have to do more layers to get good cover so be it. I went with a 2:1 ratio paint to water.


Next, I basically drowned the model in Badab Black wash. Don't be afraid to really pile it on. you want to get a pretty muckey look in the end and this will help give your paint work a basis for the patchy weathered paint job we're after.
So far so good. Now if I wanted to take this to a pristine finish this would be where we go back and do cover coats and highlighting, but this is a beast of war! No pristine polish will grace it's form. So now we go straight into a nice heavy layer of rust.

Get yourself some Solar Macharius Orange and water it down a bunch then apply it to the model using a fairly vigorous stabbing motion so that the paint blobs and splatters onto the surface on the model.
Once this first layer has dryed go through and do it again with a different orange. In this case Blazing Orange.

The key with the stippling is you want things to look rough and patchy, so the first layer of orange should be visible in patches.
Now we move on to the metallics.

Finally we want some evidence of paint which has not yet been worn away. To achieve this first give the model a nice soothing bash in your finest Devlan Mud wash. Then stipple your base colour back on while the wash is still a bit wet.

This will leave your model with the finish below. Give any battle damaged areas a little going over with the bolt gun metal to make them stand out and you're good to go.

Next time out we get onto the dirty tricks and non paint techniques. Oh and how to paint the Melta damage
Till then, Have fun with what we've covered so far.
This Week In Warhammer.
Hey folks and welcome to yet another post which isn't one of the ones I've promised, but hey, Content is content, so lets get on with it.
Last weekend my Chaos army saw it's first outting. I played Jeremy and his (filthy) Darkelves in a 1000 point game down at GW Wellington. I had a blast. and My army got smashed to pieces. Both our sorcerers detonated taking chunks out of the units they were with. He annihilated my unit of knights early on, taking out a quarter of my army in one hit. The game wound down to a close with my Knights, my Warriors and my warhounds all glaring at me from the dead pile, and only my Marauders still wandering around. We ended up calling it rather than playing out a couple of turns of movement till his big pointy units could catch and evicerate them. It was extremely entertaining.
So, on to what I've got planned for the next few days...
The Three day Challenge
This week I have fled the fair city of Wellington for a hermatage somewhere in the boonies of the manawatu. My intent whilst hiding away in seclusion is to get a number of projects done. The first will be to post the next part of the Weathering and Battle damage articles. In addition I have given myself the following tasks.
1. Island of Blood: Paint all the Skaven in Three days, and as much of the Highelves as i can manage.
2. Dreadfleet: Paint as many of the ships as possible and get at least one finished for the competition.
3. Badab War: Work out my painting methods for the upcoming Badab war campaign at GW Wellington.
4. LOTS of BLOGGING.
So what will you, my glorious readers get out of this three days of madness? Well first up there will be plenty of pictures of the various projects as they progress Secondly there will be a number of new articles.
I'm thinking How to paint white, for the High elves. Stupidly fast painting, for the Skaven. And painting and battle damaging silver marines for the Badab war. Also possibly, painting for competitions, army themeing and maybe a few other articles.
So on with the madness.
See you soon.
Sunday, October 16, 2011
This week in Warhammer
Hey folks.
It's been a weird week for me all up. I've been job hunting recently and this week saw the fruits of this search. I worked a day shifting furniture, the first in 9 months leaving me a broken husk of a man. I also had a scary intense job interview which may see me land a proper job with an income which might allow me to support my hobby a little better. But hey. Y'all didn't come here to hear about the dreary goings on in my "real" life. You came here for hobby goodness.
This week I've been working on a couple of projects for the upcoming painting competition at GW Wellington. I'm working on another Pirate conversion, which is coming along nicely and not only features some cool conversion stuff, but also some of the best freehand work I've done in a long time. I'm also having a go at an Interrogator Chaplain in Terminator armour, which will one day grace my Dark Angels army. For him I've stuck pretty much to the original model but I've done a bunch of work on the base. I'll post pics of these in the not to distant future.
I've also been chugging through my Dreadfleet stuff. I've been aiming at around two ships a week and so far the Black Kraken and Grimnir's Thunder are pretty much done. The Swordfysh and the Curse of Zandri are well on their way and I've started the base coats on the Seadrake and the Shadewraith. These ships are a real blast to paint and make a welcome change from the intensity of painting competition standard models. The White Dwarf has been invaluable for getting the ships through their basic stages and getting the colours I'm after. I've then added a few sneaky tricks of my own to take them up a bit more and the end results are looking pretty awesome. Pics to come.
Today (well yesterday if my clock is right) I had my first proper game of Dreadfleet, in which I took control of the mighty Grimnir's Thunder and had a thoroughly smashing time. First I was smashed into by the Bloody Reaver who gave me a solid drubbing leaving me with 2 points of hull damage. Then I was smashed again by a wayward living tsunami, which rocked me for another couple of points on the hull. Then there was the final smash as my ship hit the sea bed having sunk due to being on -2 hull points. Admittedly not the finest showing for the proud Dwarven race, but there shall be a reckoning! Gordon, Captain of the reaver and Staff member at GW Wellington. I hear-by enter your name into the book of Grudges for damage to the pride of Barak Varr. And Jarrod, my treacherous team mate, for loosing a Living Tsunami so close to a stricken comrade, you too shall be judged. It was however a super fun (if a little short for me) game.
Right now I'm Having a think about some ideas for a campaign to be run in store for Warhammer Fantasy, and I'm thinking about up coming projects for if I do manage to get this job I'm trying for.
Coming soon to Bellum Malleus:
- Part Two of Battle Damaging and Weathering 40k tanks.
- More Path of Chaos
- Dreadfleet Pics and progress
- Planning a themed army
- Painting competition entries, pics and advice on how to give yourself an edge.
Cheers Folks
Friday, October 7, 2011
Weathering and Battle Damaging 40k Tanks: Part One
Hey folks.
I've finally managed to stay awake for writing time for the first time in a couple of weeks so I thought I'd better thrash out this weathering article now.
For the weathering project I decided to go with a Spacemarine Vindicator tank. I've always liked this model. It's a big Brutal siege tank with a massive Demolisher cannon, designed for smashing the defences of heretic scum. I also decide to use this opportunity to do up a model for the Raptors Chapter, which have to be one of my favourite factions of the legions Astartes.
Here is an image of the model once I had striped off the old paintwork.

As you may be able to see, I have used grey stuff to model in Weld lines. I'll cover how to do this kind of detailing in a future post. Today is for weathering and damage.
To start with I wanted to have some bullet holes and divets in the the Vindicator's armoured hide. These are illustrated in the unfortunately blurry photo below along with some scrapes and the beginnings of a melta damage hole (I'll get to these later in the post)

To make the bullet holes take a pin vice and drill a hole a few millimeters deep. Then take a modeling knife and put the point in the hole and twist it round so you get a ragged edge. (Be careful the blade doesn't break) This gives a nice little bullet hole to show a direct hit. For a ricochet get a little Green stuff and role it into a ball a couple of mm wider across than your drill bit. Drill a hole in the surface you want the ricochet on and press the ball into it using a round tipped tool. Draw the tool down to squash the greenstuff aside leaving a rim at the top. (See below for a clearer image)

The Melta holes were made by drilling a hole and expanding it by twisting a modelling knife around in the hole until it reached the desired radius. I then used some Green stuff to build up a rim and some dripping metal. I was aiming to make it look like the melta had caused the armour of the Vindicator to boil away.
 The trick with melta effects actually comes from the painting, so I'll give you a glimps at the finished effect below, but the how to paint bit will be in the next episode.
In the Image to the left and above you can also see gouges in the armour. This is achieved by cutting a v shaped channel into the plastic surface with a modeling knife.
Anyway, here's that Melta damage.

That cover's the Pre paint work. Now Bung a Black spray undercoat on it and next time we'll talk about the paint. That is to say, achieving weathering and battle damage with paint effects. Then there will be a final article in the series covering the use of weathering powders and a couple of nice little cheats to take the model to the next level.
Cheers folks.
I've finally managed to stay awake for writing time for the first time in a couple of weeks so I thought I'd better thrash out this weathering article now.
For the weathering project I decided to go with a Spacemarine Vindicator tank. I've always liked this model. It's a big Brutal siege tank with a massive Demolisher cannon, designed for smashing the defences of heretic scum. I also decide to use this opportunity to do up a model for the Raptors Chapter, which have to be one of my favourite factions of the legions Astartes.
Here is an image of the model once I had striped off the old paintwork.

As you may be able to see, I have used grey stuff to model in Weld lines. I'll cover how to do this kind of detailing in a future post. Today is for weathering and damage.
To start with I wanted to have some bullet holes and divets in the the Vindicator's armoured hide. These are illustrated in the unfortunately blurry photo below along with some scrapes and the beginnings of a melta damage hole (I'll get to these later in the post)

To make the bullet holes take a pin vice and drill a hole a few millimeters deep. Then take a modeling knife and put the point in the hole and twist it round so you get a ragged edge. (Be careful the blade doesn't break) This gives a nice little bullet hole to show a direct hit. For a ricochet get a little Green stuff and role it into a ball a couple of mm wider across than your drill bit. Drill a hole in the surface you want the ricochet on and press the ball into it using a round tipped tool. Draw the tool down to squash the greenstuff aside leaving a rim at the top. (See below for a clearer image)

The Melta holes were made by drilling a hole and expanding it by twisting a modelling knife around in the hole until it reached the desired radius. I then used some Green stuff to build up a rim and some dripping metal. I was aiming to make it look like the melta had caused the armour of the Vindicator to boil away.

In the Image to the left and above you can also see gouges in the armour. This is achieved by cutting a v shaped channel into the plastic surface with a modeling knife.
Anyway, here's that Melta damage.

That cover's the Pre paint work. Now Bung a Black spray undercoat on it and next time we'll talk about the paint. That is to say, achieving weathering and battle damage with paint effects. Then there will be a final article in the series covering the use of weathering powders and a couple of nice little cheats to take the model to the next level.
Cheers folks.
Thursday, October 6, 2011
More Piratey Awesomness
So last weekend was the release of Dreadfleet. The game was fantastic, I wore a costume and much fun was had by all. I'm sure you're all dying to know how I went in the Pirate conversion competition.
Drum Roll Please.
I came Last. I also came second. Ruan's Orky pirate was truly awesome and he got a much deserved victory. My Pirate turned out pretty much exactly as I wanted him, but not very Warhammer-esque. Here are a couple of photos of him painted and stuff.


The paint job isn't too special I'm afraid.


And here is Me in the costume the conversion was based on.
Future Piratey goodness is on the way, with some Dreadfleet articles.
If you're interested in seeing Ruan's Pirate conversion go check out the GW Wellington Facebook page or shoot in to the hobby center and check it out in person whilst it's still there.
Cheers.
Path of Chaos Part one: How to Paint an Army
As promised. Here is the first of the reprints of the Path of Chaos Blog. I've been a bit rundown of late and haven't had much chance to write new stuff. Hopefully this will tide those of you who haven't read it over till I'm feeling a bit better.
Saturday, September 10, 2011
Painting an army
Hey folk, and welcome to the first of my posts on the actual methods I am using to build and paint this army.
Well we're getting toward the end of week one of the Army builder challenge and I've made quite a bit of progress. As you may already know, the idea behind the challenge is to paint one unit a week, building toward a 1000 point army over the coarse of the month. Well in week one I've gotten a little carried away and painted my first unit (20 Marauders) and my General (Tzeentchian sorcerer) and, as of typing this, I have just about completed the second unit (10 Warhounds). So in today's post I'll give y'all a rundown on what I did with the Marauders.
I tend to have two modes of painting. The first is meticulous and involves a lot of obscure techniques and arcane murmmerings which I shall not get into here. The other is army painting mode. This involves getting the models in question painted to a good game ready paint level in the shortest time possible.
The Three Foot Rule:
When painting an army it is important not to get too hung up on the look of each individual model. At the end of the day people won't be viewing each model up close and personal. They'll be looking at them from the other side of the table (hopefully as you march to glorious victory over their forces). This being the case you want to get each unit looking good from around three feet, hence the three foot rule.
Here are my top tips for getting an army done quicky.
First off, assemble and paint each unit by using a factory line. For assembly start by glueing all the legs to their bases, move up the body in stages attaching the same pieces to all the models in the unit before moving on to the next stage. With painting, start by dry brushing all the metal surface on every model then paint all the brown then the next colour and so on.
The next tip is to keep things neat. This tends to be quite difficult if you're going really fast (and it's the advice I'm worst at taking myself) but try to get each colour on neat and smooth and only in the places where you want it. The neater you are at the base coating stage, the less work you'll have to do later.
Ink wash is your friend. You can save a lot of time on some models by making good use of washes. If used properly you can get away with just base coating your models then giving them a good coating of the appropriate wash.
Keep it simple. Keep the number of colours for any given unit to a minimum. Where possible it is best to pick one metal colour, one cloth colour, one flesh colour and one detail colour. From here you can expand with a high light for each and a few variations for hair and the like. By keeping to a limited pallete you'll give your unit's a cohesive appearance and cut down on time for application.
Bright colours draw the eye, so spend a little more time getting them looking good. Make sure they are applied neatly and are well defined. it'll distract from shortcuts you may have taken in the darker areas of the miniatures.
Finally, base the models well. Make use of flock and static grass. If the unit is based well it'll look that much better.
Once you've got the army to a playable level you can always revisit it later and add highlights and details you might want. In this way you'll be playing with a fully painted army sooner rather than later.
So, that being said, here's what I did with my Marauders. (I won't bother with the details of assembly, see the tips above for how i went about that.)
First up I picked the palette I would be working with. They were as follows.
Tallarn Flesh
Hormagaunt Purple
Bleached Bone
Calthan Brown
Scorched Brown
Ultramarines Blue
Chainmail
Charadon Granite
Adeptus Battlegrey
These were backed up by the following washes.
Badab Black
Devlan Mud
Astute readers may have noticed that there are a few more colours in my list than the tips above suggest. This is because there are a lot of similar types of items on the Maruaders, the boots straps pants and loin cloths could have all been done in the same shade of brown but I was worried that if I did that it would make all these details blend in together too much. So instead I decided to make each of these things a different colour. As long as you stick to the plan of painting all the miniatures in a factory line you'll still get through them quickly, just not as quick as if you had used less colours.
The first thing I did was I went through and dry brushed all the metal components with Chainmail. This means all the weapons helmets and steel gut plates. I always try to do drybrushing first if I can so as not to run the risk of getting Chainmail all over the other colours later.
Next I painted all the skin on the models with Tallarn flesh. I then painted all the pants with Scorched Brown. Once these had dryed I ran a thick wash of devlan mud over the flesh and the pants. I then went back over the flesh with talarn flesh again making sure to leave some nice shady areas to give the skin depth.
The next stage was to go through and paint the detail items. The wrist band got Ultramarines Blue. The fur, Adeptus Battlegrey, The boots Charadon Granite and the horns Hormagaunt Purple (weird I know but trust me) The belts and straps I painted with Calthan Brown. Then i went back to the horns and painted them Bleached bone leaving thin lines of the hormagaunt puple showing. All these area then got a thick wash of Badab black. The horns also got some devlan mud.
The last stage on the main body of the miniatures was to paint their hair. For this I went outside my pallete using blondes, Reds and browns to get a little variation.
Finally I painted the shields. When painting shields it is a good idea to remember, The shield is a large and very noticable feature of the model, so you want it to really pop. to do this I went with Ultra marines Blue and Chainmail as My major colours. The Ultramarines blue got a blue ink wash to really get the colour to bounce. The chainmail was washed with watered down Badab black. Then I glued the shields in place.
At this stage I took a look at the models and checked for any patches I'd missed or needed more definition. Those That had been missed got a touch up and some areas got a little more Black wash. Then it was time for Basing.
To base the models I started with Citidel basing sand. This was painted black. Dry brushed with Graveyard earth and then given a few patches of Static grass. Personally I like to keep static grass to patches as I feel it looks better this way.
So, that was it. Unit one done. I started it on Monday and was done by Friday having spent roughly 1-2 solid hours a day on them. The really time consuming thing with this technique is always waiting for the washes to dry. You can speed things up by using a hair dryer on low, but be warned. You may end up pushing the wash to different areas of the model. It is better to use the time to work on something else, like your character models or something.
Below are some pics of the Marauders at various stages of their creation. I'll go into more detail on the sorcerer and the banner in the next post.
Cheers folks.
Ben


Friday, September 30, 2011
Visitors
Hey Folks.
For those of you who will be in the Wellington region on Monday, The Perry twins and Adam Troke will be in the Wellington Games Workshop store from 4pm. The Perrys are two of the most prolific, and in my opinion, talented sculptors out there. Adam Troke is a writer who has worked on many of the Lord of the Rings books and the High Elves army book. If you have questions about sculpting or rules development Monday is a great chance to have your questions answered by the pros.
Cheers
Ben
Monday, September 26, 2011
Ooo, that'd be cool.
For those who don't know me, I have a bit of an interest in Model Railroad. Just recently I've been thinking about trying to do a small 40k model rail layout.
My interest in the idea was originally sparked when I saw these images in the Apocalypse book a few years back.


I shelved the idea back then as being too much work (not to mention ongoing monetary concerns) But now, with the 40k city terrain, trees, craters and the awesome Realm of battle table sections, the idea not only looks way more plausable, but heaps of fun too.
So heres what I've got in mind. First off, get hold of three or four realm of battle boards. Use these to arrange a shelf layout 2ft deep by 6ft (possibly with an L layout using the fourth board.) Build up a raised track bed with Styrene and bits and pieces of City terrain and the like. Lay the track similar to the way you might have a crossing, paved surrounds etc. Assemble buildings and other scenic elements utilising the 40k city terrain, Trees, Statues, Barricades etc. For the Trains, Scratch build the bodies of the loco's and wagons using plasticard and put these on HO chassis. Then I would add characters and scenes to the layout. A gang fight might be a good option, using the Necromunda figures.
Obviously right now this is a bit of a pipe dream, but I'm really liking the idea and I thought I'd share it with you all as a way of combining interests.
Later Folks
Ben
Tell me what you want.
Hey folks. After having looked over a few comments in various scattered contacts out there, I've been getting the impression that there are a few people out there who'd like to see some coverage on the fundamentals of painting and modeling. To this end I'm envisaging a couple of step by step articles covering the assembly, preparation, painting and detailing of a Spacemarine or similar.
If there is something you'd like to see please contact me at Bellum.Malleus@gmail.com or post something on the Bellum Malleus Facebook page.
Cheers
Ben
If there is something you'd like to see please contact me at Bellum.Malleus@gmail.com or post something on the Bellum Malleus Facebook page.
Cheers
Ben
Sunday, September 25, 2011
This week in Warhammer...
I've decided in addition to my planned how-to articles and the like, I'll also try to give a weekly update as to what I'm working on, reading and thinking about. This week I've been working on heaps of stuff, far more than my usual load in fact.
I did some more work on my Chaos Knights. I'm trying a different colour scheme with these, adding gold to the palette. I've also been experimenting with the application and I believe I've come up with the best way of doing these which I'll cover in an upcoming episode of Path of Chaos.
I've been working pretty hardcore on the previously mentioned Pirate Conversion Competition. I've added a bunch of little details to the base to really give the model some points of interest. There are now Barnacles, a rat, a starfish and a crab strategically positioned about the place. This project over all has been heaps of fun and it's really been pushing my boundries in the hobby.
For the upcoming article on Weathering and Battle Damage, I've been thinking about making a start on a little Codex Spacemarine army. To this end I've been having a look through various bits of info on some of the more obscure Chapters (being that Dan and Jarrod have already got two of my favourite chapters locked down). After some consideration I've decided to go with the Raptors. For those who don't know, I used to have a Raptors army and they are an absolute joy to paint. They have a colour scheme which really lends itself well to weathering and damage too. I've started by doing a practice piece which seems to be coming along nicely, and I'm super-detailing a Vindicator to do the Vehicle section of the weathering and battle damage article.
I finally got round to finishing the assembly of my Drop Pod. (yay!)
My Empire army got a bit of further consideration this week too. Given the amount of fun I've been having with the Pirate Conversion, I wanted to get a bit of Piratey flavour in the army. I could have just put a few bits through out the Talabecland army and justified it fairly easily, but I decide to shift my focus to Marienburg. This will give me a chance to do an "Empire" army with a very different feel to the usual ones you see. I'll switch out the Sigmar cult stuff etc for the cult of Mannan, God of the Sea and Storms. I'll use lots of Militia to represent ship's crews which have been pressed into the service of the City. I'll feature a couple of Ship's gun's, and I'll use a bunch of Ogre mecinaries. Best of all though, the Marienburg livery is every bit as obnoxiously bright as that of Talabecland. It would be fair to say I'm quite excited about this project, so you can look forward to plenty of posts about them in the future.
I started a conversion for a Vampire Lord. This project is in the very early stages, but I am using Urien Rakarth as the basis of the model. I'll fill you in as I get further along the path.
Last but not least I've been picking through my Dark Angles stuff to build a solid thousand point force. So far I'm looking at a solid core of Tactical marines and some Deathwing terminators, but we'll see what happens.
So that's it. A busy week all up, but a fairly productive one. Next week I'll be working on my Warriors for the Army builder challenge and continuing with some other projects. The big News though shall be Dreadfleet. It drops on Sunday and I am fit to burst I'm so excited. Go check out the post in What's new today on the GW site for some more info and If you want it, Go Order It NOW! Today is your last chance to advanced order a copy.
Cheers Folks
Ben
(I'll post some pics tomorrow, but right now it's 4.30 am so I'm going to bed)
Thursday, September 22, 2011
A Pirate's Life for me!
Avast me matey's. Over the last few days I've been working on a conversion for Games Workshop Wellington's upcoming Pirate conversion competition. This has been by far and away the most complex conversion I've attempted in many years. There is more greenstuff on the model, the paint scheme is realatively complex and the posing is difficult, but the end result (I hope) will be a very cool little model and thus, worth the effort. Coinciding with the conversion competition is a costume competition, for which I already have something in mind, so in a fit of ill advised enthusiasm I decided to make a conversion of myself as a Pirate Captin
 I wanted to have a modeled base for this project so I decided to start there. I got a cople of broken pieces of sprue and hacked them up to look like broken timber which I arranged in a frame pattern the likes of which you would expect to find if you were to rip up your floor boards.
 On top of these I stuck a base I'd cut them rims off. I roughed up the edges to give the impression of the board edges. I then put a thin layer of Greenstuff down on top of that and sculpted in the wood grain and board edges. I also did some nail holes to really push the idea of there being boards nailed to the frame.
 I started with pieces from the Empire Militia boxed set. There are simply heaps of Piratey bits in this box, more than enough for an entire crew, let alone a single model. I used the long coat torso and cut out his chest so I could give him a doublet like mine.
I also clipped the coat a bit shorter.
I ballooned out his pants to give the impression of Trunk hose. I built up the top of his head and made a thin ribbon to do the brim. Sticking this on was a royal pain, but there was no special trick, just a lot of perseverance and quiet swearing. I put a ridge around his ankles to give the impression of shoes rather than the hose he was wearing.
 I wanted to get some more nautical terrain on the base so I decided to go with a mast. To make this I got a couple of flying base stalks and pinned them together. To hide the join I wrapped some greenstuff around it and put some lines in it to make it look more like rope. I wanted him to be grasping the mast as if to steady himself, so I searched through the bits box for an appropriate hand and came up empty. So I had to take to it with the greenstuff once more. I've never sculpted a hand before, and I think I did ok, considering the prevalence of mutation in the Old World :P
The painting turned out to be considerably easier than the conversion. I decided to stick with block colour for the moment leaving the complicated stuff for the doublet and stuff. I'll post images of that when he's 100% finished.
Cheers folks.
Ben
Wednesday, September 21, 2011
Coming Soon.
G'day all.
I've been a bit busy of late during my usual posting times, so I'm afraid I haven't got anything ready to post just at the moment. However, I thought I'd give you a rundown of the posts which will be coming up over the next few weeks.
How to paint Yellow and other obnoxiously bright colours.
Battle damage and Weathering: painting tanks and armour.
Path of Chaos: A weekly post on my Army Builder challenge project (These are being re-posted from the Path of Chaos blog)
PIRATES! My Pirate conversion competition entry and how I made it.
Shadows of the Old World: My Grey Wizard Project
A New model army: Refurbishing an old empire army for 8th edition
Dreadfleet: Soooooooooooo excited, my box has been ordered so I'll tell you all about it once it's in my hands.
As always feel free to leave comments, email me at Bellum.Malleus@gmail.com or check out the Facebook page if you have suggestions, questions or would like to contribute.
Cheers folks, I hope this has whetted your appetites.
Ben
Saturday, September 17, 2011
Yarr!
Avast ye scurvy dogs. Behold ye the booty coming soon from GW.
So by now you'll all be aware that Dreadfleet was announced today. I, for one, so excited my brain may well explode violently at any given second. The miniatures are amazing, the fluff is cool and, more importantly than any of that, It's About Warhammer Pirates! I must have it. I've stuck a smattering of hyper links in this paragraph so that you all can go check it out. Be warned! If, like me, you look at Dreadfleet and decide you want it, drop what ever you are doing and go advanced order it right now. This game will disappear fast. If you don't advanced order it you will almost certainly miss out, and then you will be damned to wander the earth for the rest of your days, lamenting your ill fate.
Check out the product description and videos here.
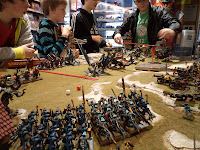
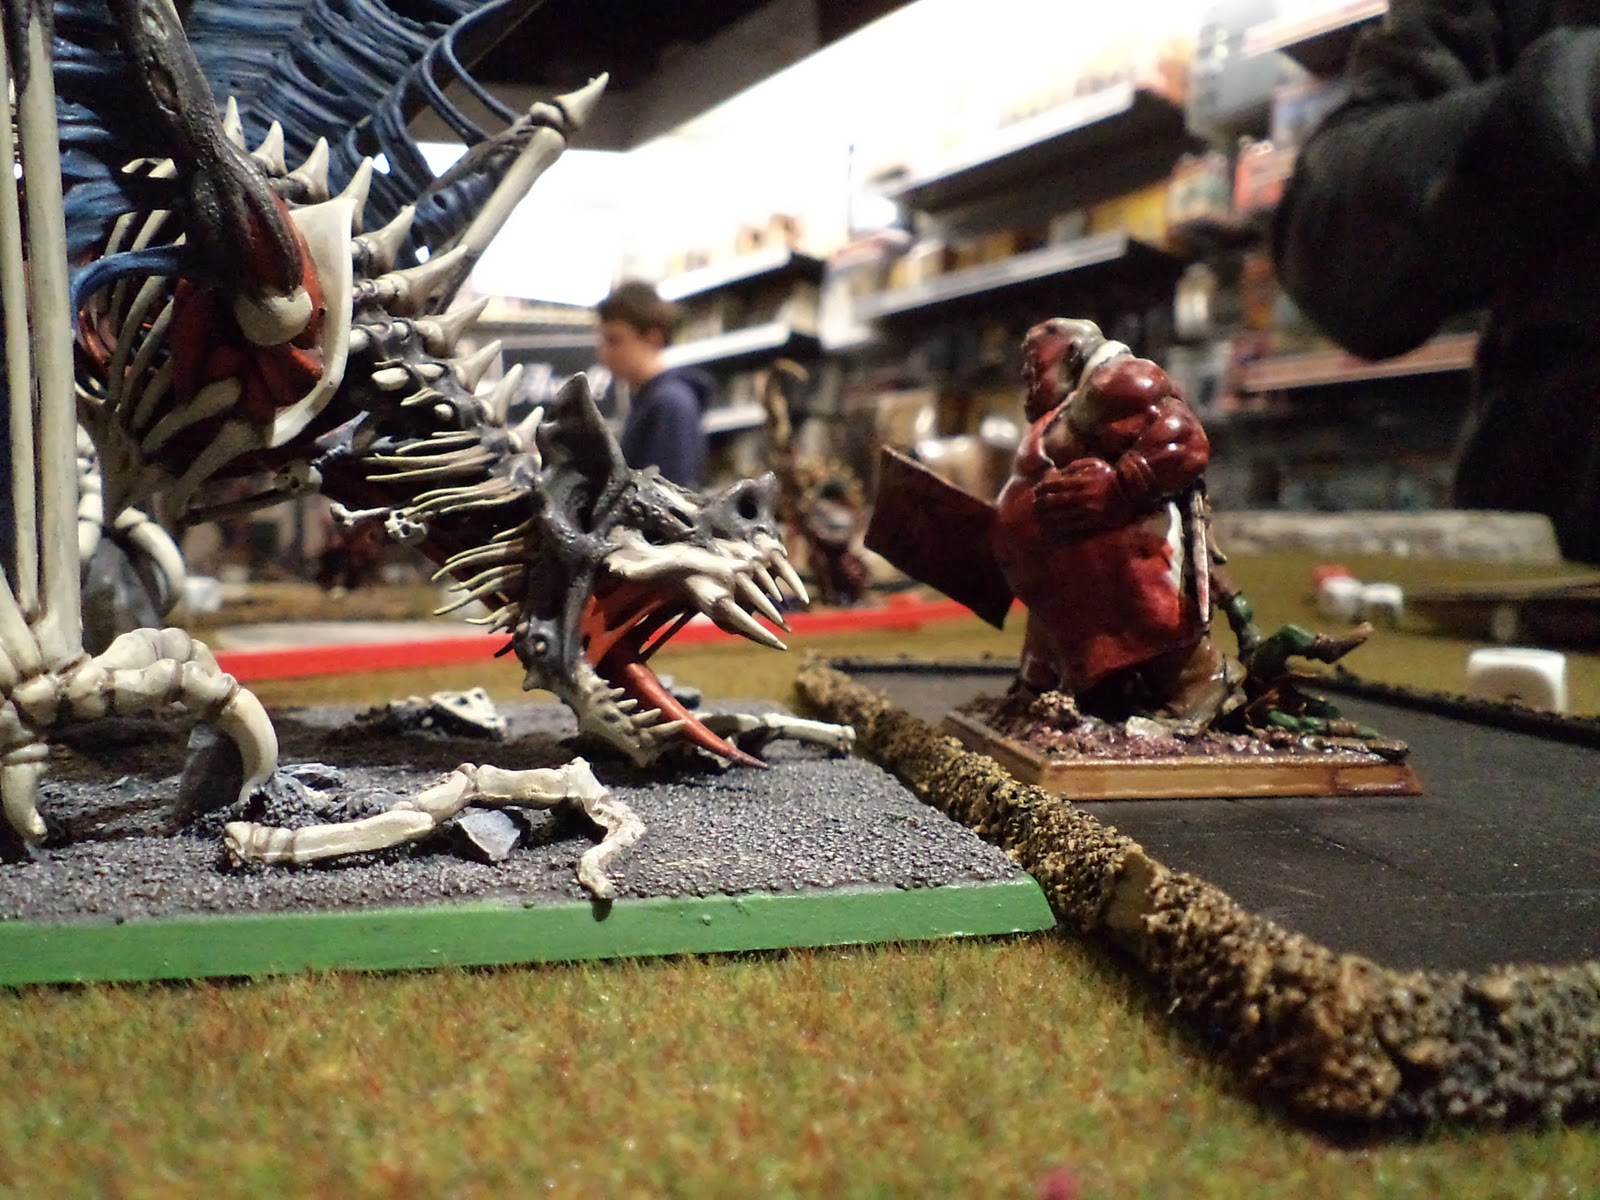
In other news. Today GW Wellington was running a Black Powder event which I took part in. It was a Blast (hur hur hur). The idea of the event was to show Ogre players the hazards of artillery, and shown they were. My Helblaster opened up for 28 hits, setting the stage for a long line of very effective shooting phases. The game ended early with the Ogres having been hosed of the table through the combined might of the Imperial artillery and massed ranks of Saurus warriors and Tomb king Beasts and magic. A real star was the Terrorgheist which killed the Ogre beasts with ease each turn. Here are the pics I took of the event.


The extremely bright artillery crews in the empire line are what I've been working on for the last few days. The Black powder event got me thinking about my long suffering Empire army, so I dug through and pulled out a couple of cannons and my Helblaster Volleygun. Having looked through the Empire army book and the excellent "Uniforms and Heraldry of the Empire" I was really torn as to which colour scheme to go with. I was thinking about the white of Reikland or something, but I really wanted something that would really pop. After chatting with Nathan at the GW Wellington store I decided to go with the Red and Yellow of Talabecland. Bellow are some images of the Artillery as they turned out.


I'll post soon on how I painted the yellow on these. I figure I'll do the technique how tos and the like as separate posts. Obviously I'm still hammering out the layout for this stuff.
Also, If you'd like to see something covered, be it painting or modelling or anything come join us on the Bellum Malleus Facebook page or email me at Bellum.Malleus@gmail.com .
Cheers
Ben
So by now you'll all be aware that Dreadfleet was announced today. I, for one, so excited my brain may well explode violently at any given second. The miniatures are amazing, the fluff is cool and, more importantly than any of that, It's About Warhammer Pirates! I must have it. I've stuck a smattering of hyper links in this paragraph so that you all can go check it out. Be warned! If, like me, you look at Dreadfleet and decide you want it, drop what ever you are doing and go advanced order it right now. This game will disappear fast. If you don't advanced order it you will almost certainly miss out, and then you will be damned to wander the earth for the rest of your days, lamenting your ill fate.
Check out the product description and videos here.
In other news. Today GW Wellington was running a Black Powder event which I took part in. It was a Blast (hur hur hur). The idea of the event was to show Ogre players the hazards of artillery, and shown they were. My Helblaster opened up for 28 hits, setting the stage for a long line of very effective shooting phases. The game ended early with the Ogres having been hosed of the table through the combined might of the Imperial artillery and massed ranks of Saurus warriors and Tomb king Beasts and magic. A real star was the Terrorgheist which killed the Ogre beasts with ease each turn. Here are the pics I took of the event.


The extremely bright artillery crews in the empire line are what I've been working on for the last few days. The Black powder event got me thinking about my long suffering Empire army, so I dug through and pulled out a couple of cannons and my Helblaster Volleygun. Having looked through the Empire army book and the excellent "Uniforms and Heraldry of the Empire" I was really torn as to which colour scheme to go with. I was thinking about the white of Reikland or something, but I really wanted something that would really pop. After chatting with Nathan at the GW Wellington store I decided to go with the Red and Yellow of Talabecland. Bellow are some images of the Artillery as they turned out.


I'll post soon on how I painted the yellow on these. I figure I'll do the technique how tos and the like as separate posts. Obviously I'm still hammering out the layout for this stuff.
Also, If you'd like to see something covered, be it painting or modelling or anything come join us on the Bellum Malleus Facebook page or email me at Bellum.Malleus@gmail.com .
Cheers
Ben
Subscribe to:
Posts (Atom)